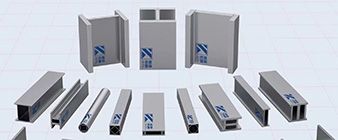
The laser welding manufacturing process for Titanium Grade 1 (Ti Gr 1 / 3.7025) involves several key steps to ensure high quality welding and efficient manufacturing. Here is a detailed overview of the process:
Material preparation
– Surface Cleaning: Thoroughly clean titanium surfaces to remove contaminants such as oil, dirt and oxides. Common cleaning methods include:
– Solvent cleaning (use acetone or similar solvent).
– Mechanical cleaning (use wire brush or abrasive pad).
– Edge preparation: Depending on the joint design, prepare the edges (e.g. beveled) to facilitate better penetration and fusion during welding.
Node design
– Joint configuration: Determine the appropriate joint design (e.g., butt joint, lap joint, or T-joint) based on application and material thickness.
– Assembly: Make sure the parts to be welded are properly aligned. Use fixtures or clamps to maintain correct positioning during welding.
Device settings
– Laser source selection: Select the appropriate laser type (e.g. Nd:YAG or fiber laser) based on specific application and material thickness.
– Focusing optics: Set the optics to focus the laser beam to the required spot size, optimizing energy density for effective welding.
– Shielding gas: Prepare an inert gas (usually argon) to protect the welding area from atmospheric contamination during the process.
Welding parameters
– Laser power: Set the laser power according to the thickness of the material and the required penetration depth.
– Travel speed: Adjust welding speed to achieve the proper balance between penetration and heat input.
– Pulse duration (for pulsed laser): If using pulsed laser welding, set the pulse duration to control heat input and minimize distortion.
Welding process
– Start: Start the laser beam and focus it on the joint line of the titanium component.
– Welding technology:
– Conduction mode: suitable for thinner sections where heat affects the surface and forms a molten pool.
– Keyhole mode: Used for thicker parts, the laser will create a keyhole with deep penetration, allowing for full penetration welding.
– Monitoring: Continuously monitor the stability of the welding process and adjust parameters as needed to maintain welding quality.
Post-weld treatment
– Cooling: Allow the welded joint to cool naturally. Rapid cooling creates stress, so cooling should be controlled with priority.
– Inspection: Perform visual inspection and non-destructive testing (NDT) methods (such as ultrasound or X-ray) to detect any defects such as pores, cracks or incomplete fusion.
– Surface treatment: Use methods such as pickling or passivation to remove any oxidation or discoloration from the welded area to restore corrosion resistance.
Final Quality Control
– Mechanical testing: If necessary, perform mechanical testing (such as tensile or fatigue testing) to ensure that the welded joint meets the strength requirements.
– Documentation: Maintain records of welding parameters, inspections and test results to ensure quality and traceability.
– Accuracy and control: High welding positioning accuracy and minimal deformation.
– Speed: faster processing times compared to traditional welding methods.
– Reduce heat-affected zone (HAZ): Limit changes in material properties and maintain the integrity of surrounding materials.
– Equipment costs: The initial investment in laser welding technology can be high, so a cost-benefit analysis is critical.
– Operator skills: Trained personnel are required to effectively operate and monitor the welding process.
-
2024-9-24 What are the benefits of using S690 steel in construction?
-
 2024-9-27 400 / 2.4360 Stainless Steel Hollow Structural Profiles
 -
 2024-9-24 S690 Structural Section-Universal Bearing Piles
 -
 2024-9-16 UNS S32304 stainless steel structural performance
 -
 2024-9-19 1.4539 stainless steel performance
 -
 2024-9-16 EN 1.4404 (AISI 316L) Stainless Steel Structure Introduction:
 -
 2024-9-16 What are some typical applications where 2205 and 1.4436 duplex stainless steels are used?


